

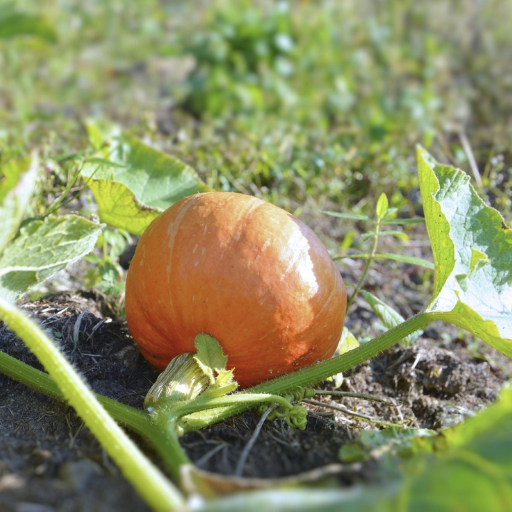
Regarding robust and high-yielding pumpkin plants, one must appreciate the essential nutrients that can boost your harvest. Potassium is undeniably one of the main elements in determining the quality, size, and overall health your harvest will yield. This blog deeply analyzes potassium fertilizers’ workings regarding their importance in plant development, their application, and identifying plant deficiencies. With this, I hope all cultivators and gardeners, novices or veterans, can optimize their approach towards their pumpkin crop and boost their fertilization with the insight provided in this comprehensive guide.
What is the Best Fertilizer for Pumpkins?

Every fertilizer for pumpkins serves a unique function, depending on the soil’s growth stage and nutrient levels. Along with the ideal complex ratio this aligns with, the 10-10-12 or 12-12-12 is particularly effective during the early growth stage because it promotes foliage and root growth. A switch towards a 5-15-15 formulation is a great way to ensure that the plant gets the much-needed boost of potassium and phosphorus during the blooming and fruit production stage. Performing soil tests is also crucial as they can identify specific nutrient deficits and unfairly customized fertilization approaches.
Understanding the Nutrient Needs of a Pumpkin Plant
Based on what I have researched, I believe that the nutrient requirements of pumpkins change throughout their growth. During the early stages of their life cycle, a balanced fertilizer like 10-10-10 facilitates root, leaf, and vine growth. When flowering commences, switching to a low nitrogen, high phosphorus, and potassium (5-15-15) formulation is imperative to ensure healthy blooming and fruiting. An ongoing soil analysis helps identify any nutrient gaps that must be addressed. However, pumpkins can be harmed due to over-fertilization, which leads to excessive foliage growth at the cost of fruit yield.
Why Potassium is Essential for Growing Pumpkins
Potassium is highly critical for the Initiation and Development Of Pumpkins as it governs many physiological factors that directly influence growth, yield, and fruit quality. In addition, it regulates water within the plant by helping maintain turgor pressure. This is highly beneficial for cell and plant structure expansion. Potassium also helps activate essential enzymes that ensure cell expansion during photosynthesis, carbohydrate metabolism, and other vital energy-producing functions, enabling nutrients to flow to the developing fruits.
The lack of potassium may restrict growth, resulting in weak stems alongside smaller or poorly developed fruits. To avoid this, the soil potassium level should be maintained at 150-250 ppm, which can be achieved through soil testing. Proper potassium levels can be achieved by applying potassium sulfate (0-0-50) or potassium chloride (0-0-60) as appropriate for soil test results. Split applications—one at planting and the other mid-season- are ideal for maintaining potassium levels throughout the growth cycle. Moreover, providing sufficient potassium not only improves the size and sugar content of the fruit but also the sturdiness and storage life of the pumpkin.
Comparing Organic vs. Synthetic Fertilizer Options
As I analyze organic versus synthetic fertilizer, I consider the composition, benefits, and drawbacks. Naturally sourced organic fertilizers like compost, manure, and bone meal improve soil structure and microbial activity in life. However, organic fertilizers cannot quickly feed fast-growing crops since they gradually release nutrients. Comparatively, synthetic fertilizers are chemically produced and contain precise nutrient ratios that crops require. While plants have immediate access to nutrients, soil health declines with extended use.
Additionally, these fertilizers are prone to nutrient runoff, which reduces soil quality. Choosing between organic and synthetic depends upon specific crop needs, soil conditions, and sustainability goals. I recommend the blended approach that combines the two. It allows for soil health to be maintained while quick nutrient uptake is achieved by throwing in some synthetic fertilizers.
How to Fertilize Your Pumpkin Plants for Optimal Growth
- Assess Soil Composition
Begin by testing your soil to determine its pH level and nutrient profile. Pumpkins thrive in slightly acidic to neutral soils with a pH between 6.0 and 7.5. Understanding existing nutrient availability helps select the right fertilizer.
- Choose the Right Fertilizer
For initial soil preparation, use a balanced fertilizer (e.g., 10-10-10) to promote even nutrient distribution. Once the plants are established, switch to a fertilizer with a higher potassium and phosphorus ratio (e.g., 5-10-10) to support flowering and fruit development. Organic options like compost or well-rotted manure can be incorporated to enhance soil health.
- Timing and Application
Apply fertilizer before planting by working it into the topsoil during bed preparation. After seedlings emerge, fertilize every 2-3 weeks. Use liquid fertilizer for quick uptake or granular types for slow, consistent nutrient delivery. Avoid excessive nitrogen during the flowering stage, as it encourages foliage growth at the expense of fruit.
- Watering After Fertilization
Constantly water the plants thoroughly after applying fertilizer to help nutrients reach the root zone and avoid leaf burn. Ensure a consistent watering schedule, as pumpkins require ample moisture for optimal growth.
- Monitor Plant Health
Observe your plants regularly for signs of nutrient deficiencies, such as yellowing leaves or poor fruit development. Adjust fertilization accordingly to address any specific growth issues.
By following these practices, you can ensure robust pumpkin growth while maintaining soil health and maximizing yield.
Preparing Your Garden for Planting
The preparation for planting begins with the aeration of the soil so that it is nutrient-rich. This is done by tilling it with well-rotted compost or manure. It is essential to test the soil pH level. I make sure it is between the optimal 6.0 and 7.0 range for the crop I intend to grow in this soil type. Afterward, I plot the layout for the crops and consider the sunlight exposure, spacing requirements, and crop rotation practices to minimize the chances of disease. Finally, I clear the area around the planting zone and remove any weeds and debris to ensure a clean and fertile region for the seeds or seedlings. This way, my plants will receive the best possible starting conditions and have great potential for maximum yield.
Steps for Effective Pumpkin Fertilization
- Soil Testing and Preparation
Begin by testing the soil to determine nutrient levels and pH. Pumpkins thrive in soil with a pH between 6.0 and 6.8. A soil test will help identify deficiencies in key nutrients such as nitrogen (N), phosphorus (P), and potassium (K). Incorporate organic matter such as compost or aged manure into the soil to improve fertility and texture.
- Base Fertilization
Before planting, amend the soil with a balanced fertilizer or one slightly higher in phosphorus to support root development. A typical recommendation is to use a granular fertilizer with an NPK ratio of 10-10-10 or 5-10-10, applied at 2–3 pounds per 100 square feet. Work the fertilizer into the top 6 inches of soil.
- Nitrogen Management During Growth
Once the pumpkin vines grow, switch to a fertilizer higher in nitrogen, such as 20-10-10, to encourage robust vine and leaf formation. Apply this fertilizer as a side-dressing approximately four weeks after planting at a rate of 1 tablespoon per plant. Be careful to keep the fertilizer at least 6 inches away from the base of the plants to avoid burning.
- Phosphorus and Potassium for Fruit Development
When flowers and fruits begin to develop, shift the focus to fertilizers rich in phosphorus and potassium to promote flowering and fruit set. A 5-15-15 or 8-24-24 fertilizer applied every 2–3 weeks at a rate of 1–2 tablespoons per plant is suitable during this stage.
- Application Techniques
Always water the plants thoroughly before and after fertilization to prevent nutrient burn and ensure proper nutrient absorption. Liquid fertilizers diluted to the manufacturer’s recommended strength can also be used for more rapid nutrient uptake.
- Monitoring and Adjustments
Throughout the growing season, monitor plant health for signs of nutrient imbalance. Yellowing leaves may indicate nitrogen deficiency, while poor fruit development may suggest insufficient phosphorus or potassium. Adjust fertilization practices based on plant performance and environmental conditions.
- Avoid Over-Fertilization
Excessive nitrogen can lead to excessive foliage growth at the expense of fruit production. Always follow dosage guidelines and avoid adding more fertilizer than recommended. A gradual, consistent fertilization approach will produce better results than overloading the soil with nutrients.
Following these steps and adjusting fertilization based on plant needs and soil conditions, you can optimize pumpkin growth and achieve a healthy, high-yield harvest.
Common Mistakes When Fertilizing Pumpkins
- Overlooking Soil Testing:
One problem I have encountered over the years is ignoring the step of soil testing. Not having critical soil data makes it simple to misapply nutrient ratios, which will lead to unexpected environmental issues like poor growth. Please ensure that the soil’s nutrient levels and pH have been analyzed. The soil for growing pumpkins can be deprived of optimal nutrient availability at the target pH range of 6 to 6.8.
- Applying Fertilizer Too Early or Too Late:
The timing of applying fertilizer to pumpkins matters quite a bit when it comes to effectiveness. There is a possibility of wasting some nutrients if the fertilizer is applied too early and can miss a few critical stages if sent during the late season. Applying the fertilizer too late can also leave out support during crucial fruit development and flowering. My technique consists of a timetable that starts with a balanced fertilizer during the initial setting and shifts towards a higher phosphorus mix towards the end of the flowering period.
- Using Improper Nitrogen Levels:
Just like too little nitrogen can stunt growth, too much is also a problem. While nitrogen is crucial for plant growth, an excessive amount overly promotes leaf development with a deficiency in flowers and fruits. A simple NPK ratio of 10-10-10 can be used during early growth. A switch can be made to fertilizer with higher phosphorus-to-potassium ratios like 5-10-10 during the set fruit stage.
- Fertilizer Distribution Issues
Problems can occur when farmers neglect to use an even distribution of fertilizer. This can lead to the destruction of roots or unsustained portions of soil through the creation of hot spots. When fertilizing, do not apply it too close to the plant’s stem; instead, do it within the drip zone. Applying too close can cause burning.
- Not Watering the Right Way
Watering plants requires as much attention as nutrition. Overstretched plant roots combined with adding fertilizer can damage the plant, but so can excessive watering. In my case, I try to make sure that the soil stays moist, applying water once or twice a week to ensure proper nutrient absorption while not oversaturating the soil.
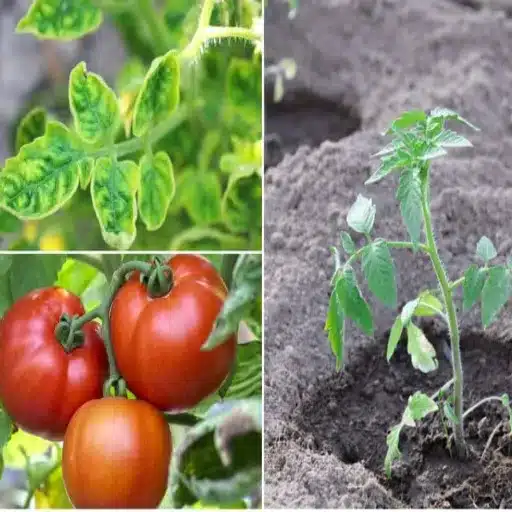
Understanding Potassium Deficiency in Pumpkin Plants
Potassium deficiency in pumpkin plants is a known nutritional problem, as it affects the health of the plant and the quality of the fruit. Potassium is vital for photosynthesis, activating enzymes, and regulating the movement of water in the plant. In deficiency cases, the common symptoms are yellowing or browning of the leaf edges (leaf margin scorch), stem weakness, and reduced fruit size or poor fruit development.
Soil testing is a must to determine if potassium levels are indeed low to correct for potassium deficiency. If so, a potassium-rich fertilizer, such as potassium sulfate (0-0-50) or muriate of potash (0-0-60), can restore the levels. Special care should be taken during application. Spread the fertilizer around the roots of the plants and combine this with good watering practices to enhance the uptake of the nutrients. Frequent checks on the soil for nutrient levels and pH balance will prevent a repeat of the deficiency.
Signs of Potassium Deficiency in Pumpkins
- Leaf Margin Scorch
The symptoms show necrosis at worst and brown or yellow edges on leaves at best. Older leaves display this failure to regulate water in the plant, which leads to leaf margin scorching.
- Weak or Brittle Stems
Potassium deficiency can lead to weak stems, likely to break when put under a stenuous situation.
- Reduced Fruit Size and Poor Development
A lack of potassium lowers the yield by increasing the number of underdeveloped fruits and reducing their size. This happens because of the inadequate movement of carbohydrates within the plant.
- Slower Growth Rate
Without enough potassium, the general growth of the plant is adversely impacted, eventually stunting it.
Technical Parameters for Diagnosis
- In diagnosis tests performed on a pumpkin, if the amount of potassium is less than 3 percent or exceeds 5.5 percent, consider it a deficiency. Any increase or decrease beyond these limits results in underdeveloped and stunted growth, respectively.
- Soil Analysis: Ideally, the value should be between 150 and 250 ppm for proper growth, and anything lower than 120 ppm signals a deficiency.
- If there is under or over-potassium deficiency, then too much variety will be caused, and growth will be interrupted.
Combining regular checks of these symptoms with specific matrices should enable the growers to confirm and help treat potassium scarcity.
How to Address Nutrient Imbalances
I always conduct soil tests and use the right fertilizers to fix an imbalance in soil nutrients. I start by regularly performing soil and leaf tissue tests to figure out where the deficiencies are and how to monitor nutrient levels. When I encounter an issue with potassium deficiencies, I simply use potassium sulfate or muriate of potash while changing the application rate per the soil analysis. That’s not all, I remember to maintain soil pH ranging from 6.0-6.8 to sustain nutrient availability, and incorporate lime or sulfur amendments where appropriate. Furthermore, I also use crop rotation and organic matter addition techniques to enhance soil nutrients without long-term consequences. Consistent monitoring, along with shifts, guarantees the best possible growth of the plants.
How to Conduct a Soil Test for Pumpkin Fertilization
To test soil for pumpkin fertilization purposes, samples from 6 to 8 inches deep within the planting area from quite a few spots should be collected to get a representative sample. These samples should be well mixed to ensure uniformity and then forwarded to a certified soil testing laboratory. The findings will recommend amendments and detailed information on pH levels and concentrations for essential nutrients such as nitrogen, phosphorus, and potassium. Use these findings to help adjust fertilization strategies for the ideal growth and yield of pumpkins. It’s necessary to do soil tests every growing season to keep the soil balanced.
Steps to Conducting a Soil Test
- Prepare the Tools—First, I clean and grab the equipment necessary for the project, such as a garden trowel, a sample bucket, and, if possible, a soil probe. All of my tools must be clean and sanitized so that I do not get any unwanted results.
- Collect Soil Samples—Within the selected planting area, I take samples from 5 to 10 different locations that are 6 to 8 inches deep. The number of spots I drill in depends on the overall size of the field so that I can be as accurate as possible.
- Mix the Samples—To create a uniform composite sample, I scoop all of the soil samples into a single clean bucket. After pouring the soil in, I mix the dirt until fully blended.
- Prepare the Sample For Testing—Following the instructions provided by the soil testing laboratory, I remove all debris, such as garments, rocks, and roots. Lastly, I fill a portion of mixed soil into a sample bag and container.
- Send The Sample To A Laboratory—I label the soil sample and include any extra comments, like what crops are expected. Then, I send it to the commonly used, certified laboratory for soil testing in my area.
- Review the Results—Once I analyze the data, which includes the pH levels, nutrient levels, and amendments required, I adjust my soil management and fertilization plans within the field.
- Now, I execute the recommendations provided; I apply the soil amendments the lab recommends to improve the health of the soil and create the right conditions for pumpkin growth.
- Customary actions: I carry out this test for my soil health as part of the routine maintenance of soil productivity and nutrient balance before every planting season.
Interpreting Your Soil Test Results
When interpreting your soil test results, focus on the key parameters provided and their recommended ranges for optimal agricultural performance. Below are the primary elements to consider:
- pH Level
-
-
- Target Range for Most Crops, Including Pumpkins: 6.0 – 6.8
- Action Plan:
-
- If the pH is below target (acidic soil), consider adding lime to raise the pH.
- If the pH is above target (alkaline soil), sulfur or acidifying fertilizers should be applied to lower the pH.
-
- Macronutrient Levels
-
-
- Nitrogen (N): Typically expressed as “Low,” “Medium,” or “High” rather than a specific level due to its mobility in soil. Ensure nitrogen is adequate without excess, which can lead to poor fruit development and environmental runoff risks.
- Phosphorus (P): Ideal Range for Most Crops: 25 – 50 ppm (parts per million)
-
Use phosphoric fertilizers like bone meal if deficient.
-
-
- Potassium (K): Ideal Range for Most Crops: 120 – 200 ppm
-
Apply potash fertilizers when potassium levels are below the recommended threshold.
- Micronutrients
-
-
- Commonly analyzed elements include:
-
- Iron (Fe): 2.5 – 4.5 ppm
- Manganese (Mn): 1.0 – 2.0 ppm
- Zinc (Zn): 1.0 – 3.0 ppm
- If deficiencies are detected, apply specific micronutrient supplements as recommended.
-
- Organic Matter Content
-
-
- Recommended Percentage: 3% – 6%
-
Organic matter improves soil structure, water retention, and nutrient availability. Add compost or well-decomposed manure to boost organic matter as needed.
- Cation Exchange Capacity (CEC)
-
-
- Target Range for Most Agricultural Fields: 8 – 20 meq/100g
-
CEC indicates the soil’s ability to hold and exchange nutrients; soils with low CEC may require frequent, smaller applications of fertilizers.
- Soluble Salts (EC – Electrical Conductivity)
-
-
- Acceptable Range for Sensitive Crops Like Pumpkins: < 2 dS/m
-
Elevated salt levels can inhibit plant growth. Leach soils with excess salts using high-quality irrigation water if necessary.
You can promptly identify imbalances and take corrective actions by comparing your soil test report values against the ideal ranges outlined above. Work closely with agronomists or soil specialists if you encounter results requiring advanced interpretation or remediation strategies.
Adjusting Fertilizer Based on Soil Analysis
Adjusting fertilizers is solely based on nutrient requirements per specific crop. I ensure all adjustments tending to soil imbalances of nitrogen, phosphorus, or potassium deficiencies are supported by a comprehensive soil test report, which helps review the soil test. If the results indicate low CEC, the frequency of applying the fertilizers would increase as low CEC soils are prone to nutrient leaching. I also consider the crop type and soil requirement before applying urea or ammonium nitrate, as confined usage might harm the crops. If I notice a deficiency in CEC, I will increase the frequency of fertilizer application. The high level of Soluble Salts on the EC scale indicates reluctance towards using chemical soil amendments and focusing instead on organic soil amendments. Overzealous usage of soil amendments can hamper effects on crops while seeking productivity at the utmost.
What Are the Best High Potassium Fertilizer Options?
Those that supply potassium in readily available forms for plant uptake should be chosen first in the matter of high potassium fertilizers selection. An example of this is potassium sulfate (0-0-50), which possesses high potassium content and also has sulfur, which aids in protein synthesis in plants. Another popular option is Muriate of Potash (0-0-60). While it also boosts potassium, it must be used very carefully because of its high chloride content, which damages salt-sensitive crops. As ammonium sulfate is a less popular inorganic source, organic wood ash, composted banana peels, and kelp meal provide a source of potassium but at a much slower rate of release. These fertilizers are based on the crop needs, the soil, and any salinity levels established in the soil tests.
Exploring Organic Fertilizer Choices
When exploring organic fertilizer choices, it is important to consider materials that provide essential nutrients while improving soil health. Organic fertilizers release nutrients more slowly, making them ideal for sustained plant growth. Below are some practical options for organic fertilizers and their corresponding technical parameters:
- Kelp Meal
-
-
- Potassium Content: Approximately 1-0-4 (N-P-K ratio).
- Key Benefits: Enhances potassium levels while contributing micro-nutrients and growth hormones conducive to root and shoot development.
- Application Rate: 1-2 pounds per 100 square feet.
-
- Wood Ash
-
-
- Potassium Content: Varies but typically around 5-7% potassium.
- Key Benefits: Acts as a quick-release potassium source while slightly increasing soil pH due to its alkaline nature.
- Application Rate: Recommended at 10-15 pounds per 1,000 square feet to avoid over-limiting the soil.
-
- Composted Banana Peels
-
-
- Potassium Content: Provides potassium along with trace amounts of phosphorus and calcium.
- Key Benefits: Slow-release, nutrient-rich organic material that is easy to produce at home.
- Application Rate: Mix into compost or apply directly around plant bases in small quantities.
-
- Green Manures or Cover Crops
-
-
- Examples: Clover or alfalfa enrich soils with potassium after decomposition.
- Key Benefits: Improve soil structure, provide organic matter, and minimize erosion while contributing nutrients.
- Timing: Incorporate into the soil before planting for optimal nutrient release.
-
Each of these options supports sustainable agricultural practices, and selecting the right organic fertilizer depends on the crop’s potassium needs, the soil’s buffering capacity, and compatibility with other amendments. Always conduct soil tests to adjust application rates and maintain optimal nutrient balance accurately.
Understanding Granular vs. Liquid Fertilizer
The focus lies in granular and liquid fertilizers’ distinctive attributes and planned use. Because granular fertilizers do not dissolve quickly, they can remain in the soil for a long time without needing to be replenished, guaranteeing a long-term nutrient supply. Their storage and transportation are more convenient; however, the need for proper placement and moisture availability makes their application more complex.
Liquid fertilizers can be used for rapid nutrient availability, which can help support fast-growing crops and quickly address nutrient deficiency. Compared to solid fertilizers, they are more readily absorbed by plants. However, they may require more frequent application, careful monitoring, and handling to prevent leaching or overuse.
Whether I choose granular or liquid fertilizers depends on the type of crop, its growth stage, the results of soil tests, and how quickly nutrients are needed. The challenge with choosing the right fertilizer is determining the ratio between efficiency, cost, and environmental damage.
Choosing the Right Fertilizer to Use for Your Needs
Choosing the correct type of fertilizer involves several vital steps that enable a plant to grow appropriately and keep the soil healthy. This process starts by identifying what the plant needs, which is done during a soil test. The standard parameters determined are nitrogen (N), phosphorus (P), and potassium (K), which is represented as an N-P-K ratio. This ratio demonstrates the percentages of nutrients available in the fertilizer and will differ based on the type of plant being grown and its stage.
For example, a fertilizer with a high nitrogen content (e.g., 20-10-10) is recommended for leafy vegetables or turfgrass, while a low nitrogen and high phosphorous and potassium fertilizer, like a 10-20-20 formulation, is good for crops such as tomatoes or flowering plants as it strengthens root growth and aids in flowering.
Other considerations would be the type of fertilizer being applied, whether organic or synthetic. Organic fertilizers such as compost or bone meal improve soil structure over time due to their slow pace of action, which can also enhance microbial activity. In contrast, Synthetic fertilizers act much quicker but can have adverse effects, such as over-fertilization, which can result in environmental issues.
To finish, how fertilizers are applied and at what point is crucial. Crops and farm conditions determine whether fertilizers should be supplied through broadcasting, foliar spray, or fertigation. Always follow the recommended application rates and intervals stated on the product label for efficiency and to protect the environment.
References
-
Fertilizing Pumpkins For Huge Fruit – Discusses the use of high potassium fertilizers during the fruit growth stage.
-
Pumpkin Fertilizer [What to Use, How to Use It] – Provides insights into different fertilizers, including foliar options for pumpkins.
-
Pumpkins and Organic Fertilizers: The Ultimate Guide – Covers organic fertilizer options and their benefits for pumpkin growth.
Frequently Asked Questions (FAQ)
Q: What is the importance of high potassium fertilizer for pumpkin plants?
A: High potassium fertilizer is essential for pumpkin plants as it supports overall plant growth, improves disease resistance, and enhances fruit development. Potassium, an important nutrient, helps synthesize proteins and starches, which are crucial for healthy pumpkin growth.
Q: How can I determine the right amount of pumpkin fertilizer for my plants?
A: The pumpkin fertilizer depends on the soil’s nutrient levels. A soil test kit can help determine the levels of nitrogen, phosphorus, and potassium, allowing you to apply the right amount of fertilizer, such as potassium sulfate or potassium nitrate, for balanced nutrition.
Q: What high-potassium fertilizers can I use for my pumpkin patch?
A: Some high-potassium fertilizers suitable for a pumpkin patch include potassium sulfate, potassium nitrate, and compost enriched with banana peels or wood ash. These sources can help increase potassium levels in the soil, promoting healthy vine and fruit development.
Q: Can I use bone meal as part of my pumpkin fertilizer regimen?
A: Yes, bone meal can be used as part of your pumpkin fertilizer regimen. It is rich in phosphorus, which, alongside potassium, supports root development and flowering. Combining bone meal with other nutrients like blood and potassium sources can create a well-rounded fertilizer mix.
Q: Why do pumpkin plants need different types of pumpkin fertilizers during the growing season?
A: Pumpkin plants are heavy feeders and require different types of pumpkin fertilizers during the growing season to meet their changing nutritional needs. Early growth stages need fertilizers high in nitrogen for leaf and vine development, while later stages require more phosphorus and potassium for flowering and fruiting.
Q: How often should I apply fertilizer to my pumpkin plants?
A: Fertilizer application frequency depends on the growing conditions and the specific fertilizer used. Generally, a balanced pumpkin fertilizer can be applied every 3-4 weeks during the growing season. Always follow the manufacturer’s instructions and adjust based on plant response and soil test results.
Q: What role does magnesium play in pumpkin growing, and should I consider it in my fertilizer?
A: Magnesium is an essential nutrient that plays a key role in plant chlorophyll production and energy transfer. While often not included in standard pumpkin fertilizers, ensuring adequate magnesium levels through soil amendments like dolomitic lime can support robust pumpkin growth.
Q: Can pumpkin juice be used as a fertilizer for pumpkin plants?
A: While pumpkin juice is not a standard fertilizer, it can be composted with other organic materials to enrich the soil. Composting enhances nutrient content, naturally supplying nitrogen, phosphorus, and potassium to hungry plants.
Q: What impact do high levels of nitrogen have on pumpkin plants?
A: High nitrogen levels can lead to excessive leaf and vine growth at the expense of fruit development. While nitrogen is necessary for early plant growth, balancing it with phosphorus and potassium is essential to ensure healthy pumpkin production.