

Composting is one of the most effective and sustainable ways to reduce household waste while creating nutrient-rich material to enhance your garden’s soil. Whether you’re an experienced gardener or a beginner looking to take the first step towards eco-friendly practices, learning how to make compost at home is a valuable skill that benefits both the environment and your plants. This guide will walk you through seven simple and actionable steps to transform everyday kitchen scraps and yard waste into a powerful natural fertilizer. By the end of this article, you’ll have all the knowledge you need to start your composting journey and enrich your garden with organic goodness.
What is Compost and Why Should You Make Compost at Home?
Benefits of Composting for Your Garden
Many other advantages of composting can directly and positively affect your garden’s health and productivity. Soil structure improvement is one of the main effects. Adding compost to garden soil develops a crumbly base medium rich in nutrients, supporting healthy root growth and holding water. But then again, that compost also aids in drainage, resulting in stronger plants that make better use of resources such as water and fertilizer.
Composting also helps put back nutrients essential for good plant growth in the soil. Compost is a natural fertilizer with nitrogen, phosphorus, potassium, and trace elements required for plant growth. The nutrients are gradually released to feed the plants sustainably over periods, thereby reducing the dependence on manufactured fertilizers. Moreover, compost generates a population of beneficial microorganisms to aid in nutrient uptake and serve as protectors of the plants against diseases.
It reduces the mountain of garden waste while protecting the environment. Organic wastes that would have ended up in landfills are put to good use in the garden as compost, reducing not only the volume of garden waste but also the emission of greenhouse gases. By taking charge of your composting project, you are reducing your carbon footprint and actively contributing to a greener environment while maintaining a blooming and productive garden.
Environmental Advantages of Composting
Composting substantially reduces the quantity of organic waste dumped in landfills. Food scraps and yard waste comprise approximately 30% of the garbage that is thrown away, while they can be composted. Through the diversion of organic matter into compost instead of landfilling, this process reduces methane emissions-also a strong greenhouse gas-from the anaerobic decomposition of organic matter in landfills.
Further, the process of composting nurtures soil health and water conservation. The nutrient-enriched humus contributes to better soil structure, which improves moisture retention, thereby requiring less watering. This sets the base for soil-healthy microorganisms and biodiversity, forming a solid ecosystem that lessens the reliance on chemical fertilizer, thereby helping to prevent water pollution.
Composting also aids in combating climate change by sequestering carbon in soils, thereby offsetting carbon dioxide emissions. In doing so, it strengthens the ability of soils to act as carbon sinks while enhancing sustainable agriculture practices. The benefits above clearly portray composting as an easy yet powerful means for waste reduction and ecological rebalance.
Understanding the Composting Process
Composting is an aerobic bioprocess in which organic materials like food and yard waste are converted to soil amendments rich in nutrients. It is a biological process that utilizes several microorganisms, like bacteria and fungi, breaking down organic matter aerobically. Good composting needs a balanced proportion of four elements: carbon, nitrogen, moisture, and aeration. Carbonaceous materials are commonly called “browns” and include dry leaves, small twigs, and cardboard, whereas nitrogenous materials (greens) include fruit wastes, vegetable peels, and grass cuttings. This equilibrium in composting is a prerequisite for a conducive environment during decomposition.
This process can be broadly considered to take place in three stages. The mesophilic stage comprises the first stage, wherein microorganisms working at intermediate temperatures commence breaking down easily degradable materials. The thermophilic stage is the second stage, wherein microbial activity spikes, sky-high temperatures (104-140°F) kick in, and the breakdown of more-complex materials such as cellulose and lignin gets underway. Compost then moves into the maturation stage, wherein microbial activity slows down and the materials become stabilized into a dark, crumbly substance with a soil-like texture.
To retain an active composting process, adequate management of conditions is a must. Oxygen must be made abundantly available, or else anaerobic conditions would set in, resulting in foul odors. Equally important is moisture, optimum being 40-60%, so as not to dry out the microorganisms but also to avoid waterlogging. Turning over or mixing at regular intervals provides aeration and ensures that decomposition proceeds throughout is uniform. By keeping close tabs on these operational parameters, composters can get an excellent compost out in a matter of a few weeks to a few months, depending on the prevailing environmental conditions and the materials with which they are working.
How to Start Composting: Building Your Compost Pile
Choosing the Right Spot for Your Compost Bin
This primary step will help you find a location for your bin worthy of efficient composting. Moderate sunlight would be ideal since warmth provides for rapid microbial action that dissolves organic matter. On the contrary, excess sunlight dries out the pile, requiring an extra measure of sprinkling water. Somewhere with partial shade is recommended.
Ensure that the surface is even and nicely drainable; water clays up going into anaerobic conditions, which causes foul-smelling odors. Positioning the bin on bare soil is always preferred as it allows interaction with soil organisms like worms and microbes, which further aids in the decomposition. If you are forced to place it on hard ground, try placing a layer of an assisting medium, either soil or some compostable material, at the bottom.
Furthermore, making bins very accessible allows them to be put to frequent use and maintenance. Proximity to the water source, aside from the kitchen, will facilitate the addition process of new materials and adjusting moisture. To prevent smell problems in the slightest, keep a little distance from sources of life assets and keep them handy for frequent oversight. With these considerations in mind, your process should be almost fully aware of efficient and sustainable operations.
What Materials to Use: Green and Brown
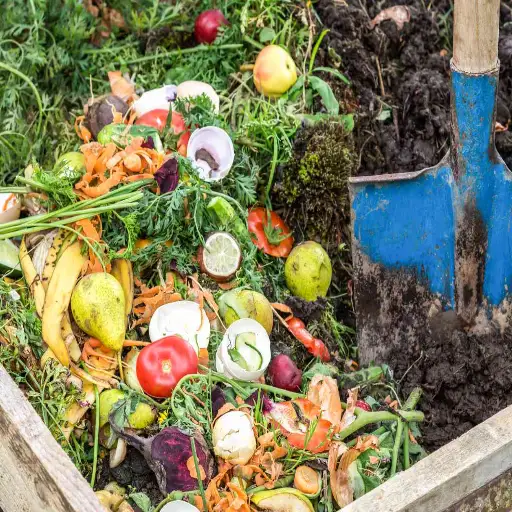
Composting is made efficient with a balanced combination of two main types of materials, commonly referred to as “green” and “brown.” Green materials are those that usually have nitrogen-rich organic waste, such as fruit and vegetable scraps, coffee grounds, grass clippings, or fresh plant trimmings. Such materials decompose quite fast because they supply the nitrogen that fuels the biological activity of composting bacteria in the compost pile. They hold a rather significant role in the active and productive decomposition process because nitrogen gives bacteria and fungi energy to break down organic matter.
In contrast, brown materials consist mostly of carbon-rich components, such as dried leaves, straw, shredded newspaper, cardboard, small sticks, and sawdust. These decompose slowly and set up the pile with adequate structure to enhance aeration and prevent compaction. They serve as food to balance out the green materials rich in nitrogen. The correct carbon-to-nitrogen ratio (usually in the vicinity of 30 parts carbon to 1 part nitrogen) is necessary for the speedy decomposition process and to avoid associated problems such as odor formation or excess moisture.
The interaction of brown and green materials at a proper ratio promotes an environment favorable to the microbes involved in composting. The layering as well as mixing of these materials allows for better airflow and more uniform moisture distribution, thus speeding up decomposition. Such mixing combined with regular turning will enable a complete distribution of compounds, the penetration of oxygen into all layers of the compost, and the evoking of a uniform temperature throughout the compost. A balance will hasten decomposition while producing rich, nutrient-laden compost that melts into soil, thereby enhancing soil structure and fertility and promoting its use for commercial farming or gardening.
How to Layer Your Compost for Optimal Decomposition
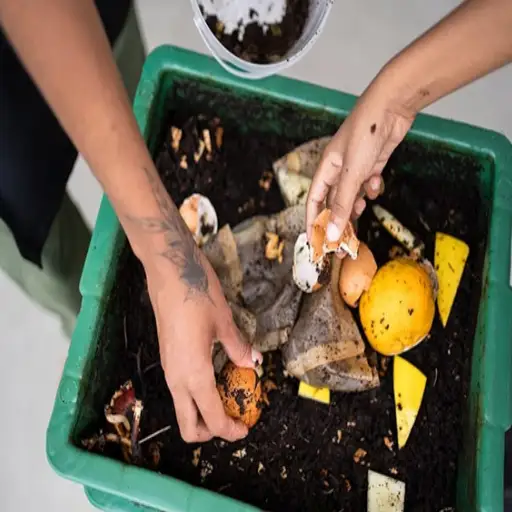
To build an effective compost pile, precise layering is necessary to engineer uniform decomposition and provide ideal conditions for microbial activity. Begin with a layer of coarse materials, such as small twigs or branches cut into short pieces, for easing air passage from below and preventing compaction. Next, place nitrogen-rich “green” materials that might include freshly cut grass, scraps of fruits and vegetables, and grounds from the coffee maker. These are targets for nitrogen stimulation toward microbial growth and activity.
Alternate with “brown” materials rich in carbon, like dry leaves, straw, shredded paper, cardboard, etc., as these provide energy to the microbes. An excellent level for the carbon-to-nitrogen ratio (C: N) is around 25 to 30:1, providing a quick composting pace. Placing such materials evenly within layers is of high importance; overloading any of the materials causes imbalance, resulting in slow decomposition in some instances and offensive smells in others.
To moisturize the pile evenly, add water lightly to the pile once you layer it. The pile needs to be as moist as a wrung-out sponge; anything less, and the microbes slow down their activity; anything more, and anaerobic conditions might be initiated. For larger piles, think about some finishing techniques like covering the pile top with a breathable tarp, which would keep it moist but allow enough ventilation. Regular monitoring and periodic turning would encourage evenness and would halve the normal time of decomposition for your compost to be used.
What are the Best Methods for Making Compost at Home?
Traditional Compost Pile vs. Compost Bin
As is often the case when comparing a traditional compost pile to a compost bin, both methods serve the purpose satisfactorily, yet each has its peculiar advantages. Space, climatic considerations, and individual preferences tend to weigh in. A simple compost pile would be cheaper and less time-consuming to set up because there is no equipment to purchase. This option is best if you have outdoor space and can accommodate an unprotected compost pile, provided that you are diligent in turning the pile often and closely monitoring moisture levels to prevent pests and odors.
In my mind, compost bins are an excellent second option for those whose yards are a bit smaller or for those wanting to keep a more contained, less messy approach to composting. Bins offer the advantage of keeping pests away and retaining moisture, at least in dry climates. Bins can be anything from a simple store-bought unit to a complete do-it-yourself project, complete with repurposed trash cans. A neat-looking bin is far better than a naked pile in an urban or neighborhood setting, particularly when neighbors express concern about what could become a shame to them.
This means that the choices and considerations for a compost pile or bin will depend on one’s circumstances. If space is adequate and the person wants to keep it simple and cheap, then a traditional pile will suffice. But a compost bin will compensate for all the conveniences, pest control, and controlled environment that one could wish for.
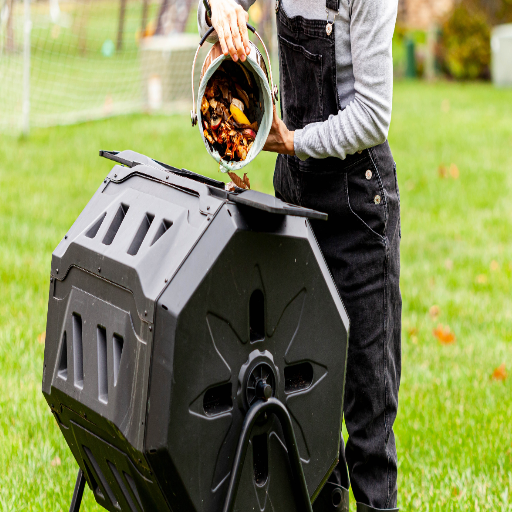
Using a Compost Tumbler: Pros and Cons
A compost tumbler is a closed container meant to ease and hasten the process of composting by allowing easy mixing with the required air. One of the main advantages of the tumbler is that the output of finished compost is processed much faster. Due to its enclosed nature and the regular rotation it undergoes, a tumbler maintains excellent levels of moisture and aeration and thus speeds up decomposition, usually producing compost within 4-6 weeks under good conditions.
In addition, tumblers keep away foul smells and pests. Where the pests and unwanted smells were an issue with open, uncovered piles of compost, the sealed structure assures protection from rodents, ants, or any other capable animals, also reducing the chance of foul smells, given that periodic mixing prevents anaerobic decomposition. Tumblers provide a solution that is neater, cleaner, and more compact, being a plus for someone with limited outdoor space or wanting a more confined process for composting.
On the downside, some drawbacks do come to mind: Most tumblers have to be rotated by hand, which is either too heavy or tough to move for some people, depending on the size of the tumbler or the strength of the individual. And due to its enclosed nature, tumblers somewhat limit airflow and can therefore promote anaerobic decomposition if not managed properly in terms of airflow. The tumblers are also quite limited in terms of volume, thereby not making them very suitable for use in the disposal of large quantities of organic waste on a usual basis as opposed to conventional composting methods. And the initial purchase price of a good tumbler may well be many times the cost of a simple compost bin.
In essence, bearing in mind that it can offer a controlled and accelerated composting system, a tumbler is perfect for small or medium composting, basically in an urban or suburban environment. Taking into consideration the volume of waste to be processed, the upkeep involved, and the initial investment needed will help someone decide whether a tumbler is well suited to their particular composting requirements.
Vermicomposting: Compost with Worms
Vermicomposting is a specialized kind of composting that uses certain types of worms, such as Eisenia fetida or red wigglers, that very efficiently turn organic waste into its edible nutrients. Worms ingest the organic matter and excrete nutrient castings, ideal fertilizers for plants. Because of its potential use in a tiny bin system, even indoors, it’s a good method for those who lack any significant outdoor area.
The worms have technical needs to survive and be profitable: moisture will be optimum around 60 to 80%, while the temperature for peak production must remain between 55°F and 77°F. The compost feed would mainly include vegetable wastes, fruit peels, shredded paper, and coffee grounds; oily residues, meats, or dairy products are shunned because they cause odors or attract pests. One pound of red wigglers can convert half a pound of organic waste in a day.
Vermicomposting presents several benefits, such as assisting in faster decomposition with less odor and producing superior vermicast containing NPK in an inorganic form. Vermicompost has been studied and found to improve soil structure, enhance microbial activity, and increase crop yield; it is hence considered an eco-friendly waste management technique. The worm bin must be maintained correctly by aerating regularly and preventing overfeeding to keep a good vermicomposting system in operation.
How to Maintain a Healthy Compost Pile?
Turning Your Compost: When and How
Plenty of turning sustains an important decomposition process. Turning of a compost usually occurs anywhere between 1 and 2 weeks from when it is started, or in case it gets too hot inside, as the heat above 140°F (60°C) can kill some valuable microorganisms. By using a compost thermometer, the turning can be timed quite precisely.
When turning, it’s good to mix the outer, cooler layers with the hot core to enable the material to decompose evenly. This also aerates the pile as oxygen levels diminish in composting piles, and anaerobic conditions sometimes develop. This condition inhibits microbial activity and hence produces foul odors. You have to measure the moisture of your compost as well because it should be wet enough to feel like a wrung-out sponge, as opposed to being too dry or too wet, both of which would inhibit decomposition.
Turning frequency may vary according to the composition and particle size of the materials in the pile. For example, larger particles or materials high in carbon (e.g., wood chips) may require more frequent turning to support adequate degradation rates. Adjusting turning practices to suit the waste being composted will ensure that microbes work with optimum efficiency and consistent quality in the final product.
Monitoring Moisture Levels in Your Compost
Drinking water is essential for microbial life and, inevitably, for the decomposition process in a composting system. Most of the appropriate general moisture content for compost is between 40-60%, where microbes work on their metabolism; however, at the high level of 60%, it would hold moisture and prevent aeration. A higher level of moisture causes the compost to get compacted, arresting air ingress, building conditions for anaerobic bacteria to come in and produce foul odors. On the opposite spectrum, very little moisture can retard the act of decomposition and eventually hinder microbial activity: hence, a prolongation of the entire composting procedure.
One easy way to test moisture is to grab a handful of compost from the pile and squeeze it hard; if a couple of drops of water come out and the material stays glued together, then all is fine concerning moisture. In all cases, a more accurate method would be to employ a moisture meter calibrated for organic material and thereby always yield reliable data. Inspecting moisture content frequently after high rain events or periods of inclement weather and making appropriate adjustments by either adding water or dry carbon is strongly advised.
With these recent changes in composting technology, moisture can be viewed side-by-side with temperature in real time via IoT-enabled sensors. This could serve to optimize the whole management process by sending automated alerts when the moisture levels drop below or rise above the desired window, thus improving the quality of the compost and its general efficiency.
Preventing Common Composting Problems
Bad odors, pests, and slow composting – these typical composting problems exhibit an imbalance in the composting process. For example, rotten odors mean the ratio of carbon materials (“browns”) to nitrogen materials (“greens”) is wrong. The recommended ratio of “browns” to “greens” is two to three parts of carbon to one of nitrogen. Good aeration is the next most important factor, as unmixed anaerobic conditions produce foul smells. Turning the pile becomes very essential as it brings oxygen to promote aerobic decomposition.
The pests are generally attracted to compost through food residues. Hence, be sure never to add meat, dairy, or oily products to your compost heap. Also, dispersing fresh food scraps in layers of dry carbon materials or soil can hide their scent so pests are less attracted to them.
With the situation of slow decomposition, perhaps moisture content and particle size need to be considered. If the moisture content is right, then keep it at a wrung sponge level, making it too dry would resist microbial activity, while if there is too much water, some areas become compacted and anaerobic. Besides, crushers or choppers do a good job of breaking up organic materials, which greatly increases the surface area available to the decomposers and greatly speeds up composting.
By synthesizing the above tips with the use of modern sensor technologies (such as moisture and temperature monitoring systems), practitioners in composting can keep composting conditions on track and therefore avoid typical problems, resulting in a smooth and well-executed process with great outcomes.
How to Use Finished Compost in Your Garden?
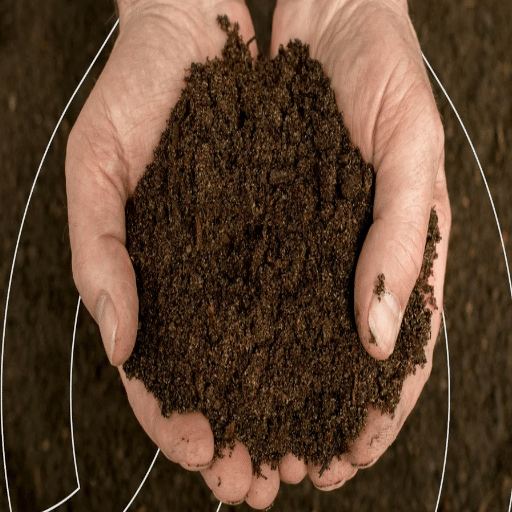
Identifying When Compost is Ready to Use
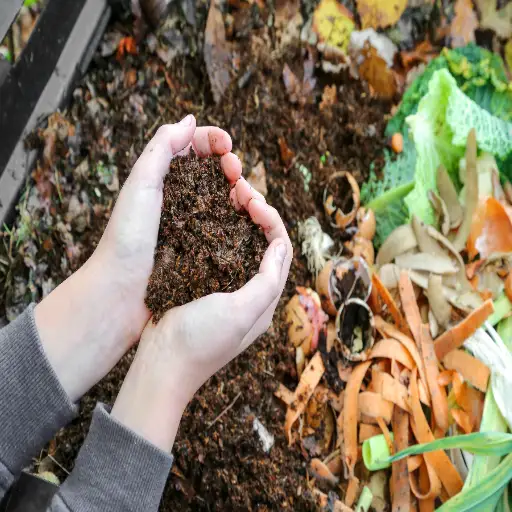
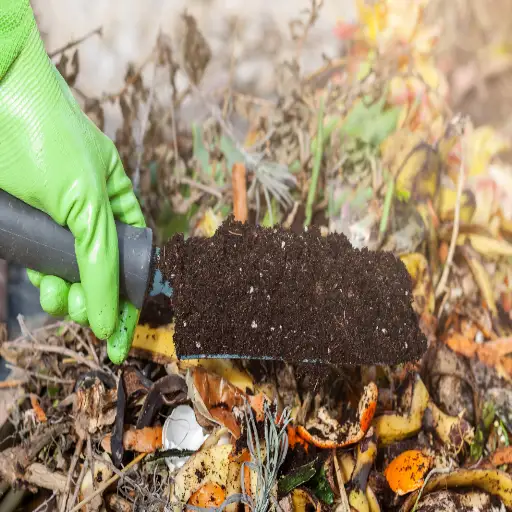
Determining compost readiness involves a careful review of its physical, chemical, and biological properties. Mature compost is generally dark brown to black, crumbly, similar to soil, and slightly earthy in smell. Such signs indicate that organic materials have been completely degraded by microorganisms, and the compost contains no toxic compounds that may impede plant growth.
Chemically, the C: N ratio of mature compost normally saturates in the range of 10:1 to 20:1, expressing its full maturity and ability to similarly supply nutrients to plants. Likewise, mature compost has a pH from 6.5 to 7.5, rather neutral or mildly acidic, giving an ideal setting for the growth of plants. For specialized users, temperature following specific composting pathways is another factor to consider- their compost is ready when cool temperatures set in after the thermophilic phase of decomposition has passed.
Also, verifying compost maturity can be supported by modern instrumentation and analysis, including handheld moisture meters or laboratory assessments for nutrient concentration, such as nitrogen, phosphorus, and potassium. With the traditional means of judging the finish with sensor technology, gardeners can rest assured that the compost is mature and ready to go to the bed, leading to healthier soil and good crop yields.
Applying Compost to Garden Beds
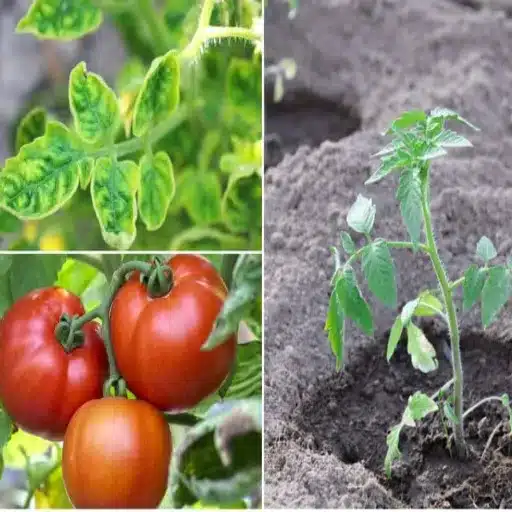
Several key factors must be considered before applying compost to a garden: the soil type, the nutrient requirements of the plants, and the right time for compost application. Compost is spread generally on the surface of garden beds at a depth of 1 to 3 inches, depending on the needs of the plants being grown. For heavy-feeding plants such as tomato or squash, a thicker layer might be more appropriate. Check the texture of the compost before applying should be fine, and free from any big clumps or undecomposed materials so that it will mix readily with the soil, and nutrients can be uniformly available.
To incorporate compost, gardeners need to rake or till the soil so that the compost is incorporated just lightly into the first 6 to 8 inches of soil below. This will enable the nutrients to go about their work properly in adjusting soil texture, aeration, and water retention. Compost can be simply applied as a top layer or mulch for no-dig gardens, while environmental processes will take time to work on nutrient incorporation. Do consider the main planting season as well while applying. If compost is applied several weeks in advance of planting, it would allow for nutrient stabilization in the soil and a good build-up of microbial life.
Studies have proven that nutrient content in compost varies widely with the nature of organic materials used for its making. Nazis concentrations in mature compost usually fall in ranges from 1.5 to 3.5% nitrogen, 0.5 to 1% phosphorus, and 1 to 2% potassium. Regular soil tests can help gardeners to match such compost applications to the nutrient requirements of their beds, thereby avoiding soil nutrient imbalances, which could lead either to poor plant growth or environmental deterioration. Combining practices that work well with modern tools that measure compost quality will afford gardeners the realization of maximum compost application advantages aligned with sustainable and profitable gardening efforts.
Making Compost Tea for Fertilizing Plants
The making of compost tea is essentially steeping compost in water to draw out beneficial microorganisms and nutrients that will further aid in plant health and soil vitality. The process starts with high-quality, mature compost that is tested for proper and balanced nutrient profiles and active microbial communities. Commonly, this compost would be placed within a porous bag or just put in a container of chlorine-free water if one is able to avoid chlorine, as the chlorine will destroy vital bacteria needed for the tea.
Aeration is then initiated to maximize microbial activity by introducing an oxygen-rich environment that is favorable for the growth of beneficial aerobic organisms. After about 24 to 48 hours of steeping, the water becomes nutrient- and microbe-rich. Additives such as unsulfured molasses or kelp extract can be added to feed the microbes, giving them the best chance at reproduction and metabolic activity.
In order to keep microbes active, compost tea is best used immediately after brewing. It can be applied near the root zone of the soil or sprayed directly on plant foliage, where the beneficial microbes can attach to plant surfaces and help develop resistance against pests and diseases. In case of spraying, the liquid has to be filtered so that it doesn’t block the spray nozzles in any way. Compost tea, when used correctly, supports sustainable gardening possibilities in nutrient availability and soil ecology while lessening dependence on synthetic fertilizers.
References
Frequently Asked Questions (FAQ)
Q: What are the step-by-step instructions to start home composting?
A: To start home composting, begin by selecting a site for your compost pile or bin. Next, gather compost materials such as kitchen waste, yard waste, and brown material. Layer these materials in your compost bin, alternating between green and brown materials. Maintain the moisture level, and occasionally turn the pile to aerate. Finally, monitor the temperature of the compost to ensure it is breaking down properly.
Q: What are the best composting methods for beginners?
A: Beginners can start with simple composting methods such as using a compost pile or a compost bin. For those with limited space, using a compost bucket under the sink for kitchen scraps can be effective. Open compost methods in the backyard are also easy to manage and great for those who want to compost larger amounts of waste.
Q: How can I effectively use kitchen scraps and yard waste in my compost?
A: To use kitchen scraps and yard waste effectively, chop or shred them into smaller pieces to speed up the composting process. Mix the scraps and yard waste with brown materials like dried leaves or shredded paper to balance the carbon-to-nitrogen ratio, which is essential for producing great compost.
Q: What are some ways to enrich your garden with compost?
A: Enrich your garden by applying fresh compost as a natural fertilizer. Spread a layer of compost around plants to improve soil structure, retain moisture, and provide essential nutrients. Compost can also be mixed into potting soil for container gardening to enhance plant growth.
Q: How often should I turn the compost pile to speed up the process?
A: To speed up the composting process, turn the compost pile every 1-2 weeks. This helps aerate the pile, maintaining a healthy temperature in the center of the pile, and ensures that the compost materials decompose evenly.
Q: What types of compost materials should I avoid adding to my pile?
A: Avoid adding meat, dairy products, and oils to your compost pile as they can attract pests and create unpleasant odors. Additionally, avoid composting diseased plants and chemically treated wood or grass clippings.
Q: How do I know when my compost is ready to use?
A: Compost is ready to use when it has a dark, crumbly texture and an earthy smell. The original compost materials should no longer be recognizable, and the temperature of the compost should be consistent with the ambient temperature, indicating that decomposition is complete.
Q: What are some common mistakes to avoid when making compost at home?
A: Common mistakes include not balancing green and brown materials, which can lead to odor issues and slow decomposition. Overwatering or underwatering the pile can also hinder the process. Additionally, failing to turn the compost regularly can result in uneven decomposition.
Q: Can I compost in winter, and if so, how?
A: Yes, you can compost in winter by insulating your compost pile with straw, leaves, or a tarp to retain heat. You may also consider using a hot compost method, which generates more heat internally and continues decomposing materials even in colder temperatures.
Q: How can I use compost to achieve a zero waste lifestyle?
A: To achieve a zero waste lifestyle, use composting to recycle food waste and yard waste instead of sending them to the landfill. By composting kitchen scraps, you reduce waste, create nutrient-rich soil for gardening, and contribute to a more sustainable environment.