

Every morning for six good weeks, Maria irrigated all her tomato seedlings with coffee grounds. Nitrogen would be consumed in rich growth, yet all progress bowed under yellow guilt and inexplicable stalling. Raw coffee pH from a compost heap locked up nitrogen in the ground, pauperizing acts it was so richly doing.
The promise of DIY organic manure is even greater with talks of compost tea from banana peels or eggshell burials. The kitchen scraps remain free, green, and the best kind money can buy. But here is where most garden blogs goof up: you fertilize blind when you use homemade materials with unknown NPK values. Nutrient imbalances waste time, impede growth, and hurt soil life.
Beyond this amateur-written manual laid down for DIY organic fertilizer with twelve recipes experimenting on a few good ones that had not been given any NPK values, along with certain guidelines to keep it perfectly safe and to suggest some stuff from elsewhere in case Create Your Own is not good to you.
What Counts as DIY Organic Fertilizer?
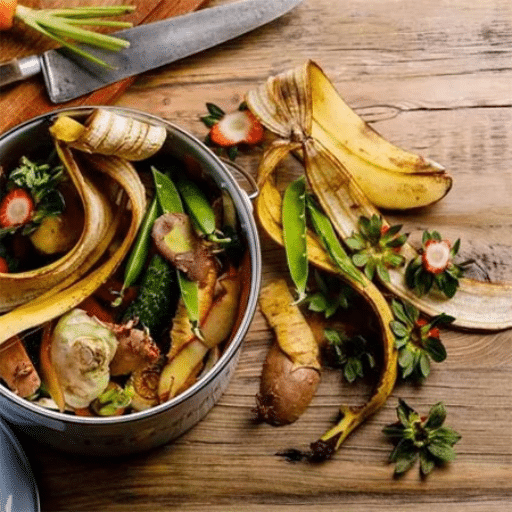
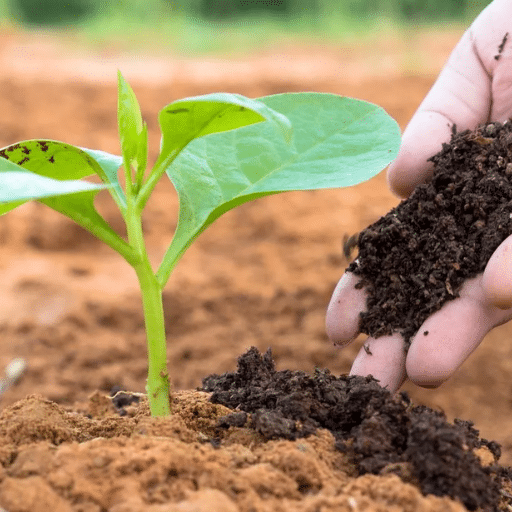
DIY organic fertilizer means any plant nutrient source that you make from materials that are natural and not synthetic rather than buying a product processed in a factory. These inputs can range from kitchen scrap remains to garden wastes, animal manures, or mineral amendments that you process, ferment, or compost yourself.
The core idea is quite simple. As plants grow, they need nitrogen (N), phosphorus (P) for roots and flowers, and potassium (K) for fruit development and overall vigor. DIY is recycling waste streams into these nutrients.
Homemade organic fertilizers appear very different from named, certified commercial products by one main trait: uniformity. The banana peel from Ecuador provides a different nutrient profile than one from California, and the whole process changes with each batch of compost.
That variability is not a dealbreaker for backyard gardens. It simply means you need to test your soil, observe your plants, and treat NPK values as approximations rather than guarantees. For a deeper breakdown of every organic input category, read our complete guide to types of organic fertilizers.
12 DIY Organic Fertilizer Recipes with NPK Values
Below lists are categorized by the magnitude of complexity, beginning with simple amendments by moving toward fermented teas and specific brews. Each listing is accompanied with an approximate NPK value based on published agricultural data.
1. Compost Tea (Balanced NPK ~0.5-0.5-0.5)
Give a cup of tea on the list as a natural Do-It-Yourself (DIY) fertilizer commonly used by organic gardeners. It allows soluble nutrients and beneficial microbes to leach out of finished compost to the water.
Here is what you need:
- 1 gallon of more-or-less finished compost (sweet, earthy soil with no foul odors)
- 5 gallons of water-dechlorinated tap water or rainwater
- Some sacking made of burlap or fine mesh bag
- Use an aquarium air pump, if available
What to do:
Put compost in the sack and steep in water. Aeration with a pump should last for 24-36 hours. The tea can also be left to steep at least 48 hours with removal of the sack, this time stirring twice every day. The liquid ought to smell fresh, like earthy soil-not rank.
Uses: Mix with 4 parts of water, then use as a soil drench or foliar spray twice over the growing time.
Great crop-growing companions: Veggie gardens, container plants, and grasses necessary for a mild yet broad-spectrum nourishment.
2. Banana Peel Fertilizer (High Potassium ~0-0.3-1.2)
Banana peels are a good source of potassium for flowering and fruiting. They are low in nitrogen and phosphorus, so they are good when combined with an additional source of nitrogen.
What you need:
- 3 to 4 banana peels
- 1 quart of water
How to make it:
Chop the peels into small pieces, and then place them in water. Close the jar lightly, allowing it to ferment for 48 hours. Strain and use immediately.
Application: Pour it around the base of the flowering plants. Bury the peels of chopped banana directly into the soil, close to the roses, the tomatoes, or the peppers.
Good to handle: Tomatoes, peppers, roses, citrus, and other flowering or fruiting plants.
3. Eggshell Calcium Boost (Calcium ~1.2%)
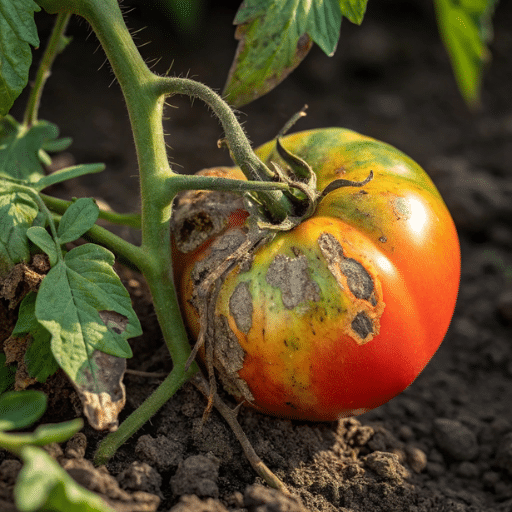
Eggshells are not a complete fertilizer; rather, they supply calcium for the prevention of blossom end rot in tomatoes and for the strengthening of cell walls.
What you need:
- 10-12 rinsed eggshells
- a blender or a mortar and pestle
How to make it:
Bake the shells at 200 degrees F for 20 minutes to sterilize them. Grind into fine powder. The more finely you grind, the more quickly calcium becomes available.
When to Put it to Use: At the time of planting, place 1 tbsp of powder in the soil around each plant, side dressing it again once a month during fruit development.
Best for: Tomatoes, peppers, eggplants, broccoli, and anything is prone to calcium deficiency.
4. Coffee Grounds Top Dress (Nitrogen ~2-0.3-0.2)
Used coffee grounds contain roughly 2% nitrogen by dry weight. Contrary to popular belief, they are only mildly acidic once composted, with a pH near 6.5 to 6.8 according to research from Oregon State University.
What you need:
- Used coffee grounds (never fresh, unbrewed grounds)
How to make it:
Dry the grounds on a sheet pan for 24 hours. Apply them as a side dressing or mix lightly into the top inch of soil.
Application: Sprinkle a half-inch ring around each plant, staying 3 inches from stems. Apply monthly.
Best for: Leafy greens, cabbages, and nitrogen-hungry crops. Avoid heavy application on seedlings.
5. Epsom Salt Solution (Magnesium and Sulfur)
Epsom salt is magnesium sulfate. It does not provide a complete range of nutrients but can correct magnesium deficiency. Signs of magnesium deficiency include leaves showing yellow between their veins.
What you need:
- 1 tbsp. Epsom salt
- 1 gallon of water
Directions:
Dissolve the Epsom salt completely in warm water and store it in a sealed container.
Application: Apply as foliar spray or soil drench every 4-6 weeks.
Good for: tomatoes, capsicum, roses, and lawns showing deficiency in magnesium.
6. Grass Clipping Mulch Tea (NPK ~1-0.2-1.5)
One of the best nitrogen greenings around is grass clippings. They generate nitrogen tea nearly overnight.
Ingredients:
- 2 cups fresh, untreated grass clippings
- 1 gallon water
How-To:
Step clippings in water and hold down with a stone. Steep for 3 days. Stir once daily. Strain thoroughly.
Usage: Dilute 1 part tea to 2 parts water. Apply weekly as a soil drench.
It’s for: Corn, lettuce, spinach, and quick-growing annuals. Always choose clippings from lawns not treated with herbicides.
7. Comfrey Leaf Liquid (NPK ~1.8-0.5-5)
Comfrey bio-accumulates, taking potassium as well as trace minerals which are frequently required in the garden economy of this biodynamic approach.
Things to have:
- One pound of fresh comfrey foliage leaves
- Lidded bucket
- Weight or brick
The way to go about it:
Prepare a bucket with leaves packed in them. Now you have to cover the leaves with water. If you put a weight on top (some object), it will help to keep the foliage inside the water. Then seal it lightly and let the brew ferment for about 4-6 weeks. Produkt will have a strong odor.
Dosage: To apply, first mix 1 part tea with 10 parts water; the tea is applied every fortnight.
Best for: Fruit vegetables, potatoes, and fruit trees. Do not use comfrey tea on seedlings; it is not gentle for them.
8. Fish and Seaweed Blend (NPK ~5-2-2)
This is a rather close DIY answer to a balanced high-grade fertilizer. Fish waste contributes nitrogen and phosphorus while seaweed supplies the potassium plus growth hormones and trace minerals.
Ingredients:
- Fish scraps (heads, bones, guts) from a clean saltwater or freshwater catch
- 1 cup dried kelp or seaweed
- A 5-gallon bucket with a tight lid
- 1 gallon of water
- 1 cup unsulfured molasses
Instructions:
Layer the fish scraps and seaweed in the bucket, then add water and molasses. Seal the lid.
Ferment for 2 to 3 weeks, burping the lid every two days. Strain through cheesecloth.
Use as a diluted drench 1 part fertilizer to 5 parts water every 10-14 days for heavy-feeding crops like tomatoes, squash, corn, and marijuana.
9. Manure Tea (Variable NPK; Safety-Critical)
Herbivore feces manure, that serves one of old age’s own DIY natural fertilizers, be better known by dishing out many essential speech as to which manure component-from which herbivore-to get the most out of the unused feedstuff. Nutrient content varies where different animals are on different diets with varying bedding and thus differing values.
What you will need:
- 1 shovel full of well-aged cow, horse, sheep, or rabbit manure (at least 6-month-old)
- 5 gallons of water
- Burlap sack
- Directions:
Place aged manure in the burlap sack before placing it in a 5-gallon bucket of water to steep for 7 to 14 days while stirring it each day until the water changes its hue, becoming the color of a light, weak tea and not deep sludge.
Usage: Dormant manure tea should be diluted, being poured over the soil only–and never as a foliar spray for any food-growing crops.
Word of Safety caution: Note that raw or underaged manure carries E. coli, salmonella, and other pathogens. The USDA National Organic Program mandates a 90-day pre-harvest interval for food crops when treated with raw manure; 120 days in the event an edible food portion comes into contact with the soil. Always make sure to have aged manure before you actually brew the tea.
Best for: Corn, squash, pumpkin, and nonfood ornamental beds.
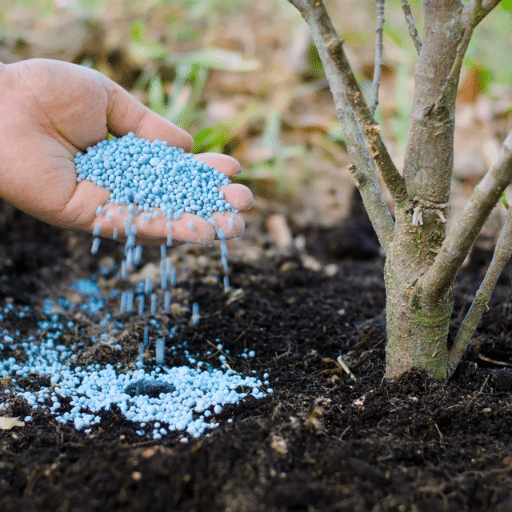
10. Wood Ash (NPK ~0-1-5, Alkalizing)
One of the classic sources of potassium for one’s backyard is the hardwood ash from your fireplace or fireplace birch. Besides, they bring up the pH of the soil.
The materials to be found:
- 1 cup of cool hardwood ash (oak, maple, or birch)
Procedure for making:
Sieve the ash to extract charcoal chunks and nails. Stock on dry on a metal container.
Application: Sprinkle one tablespoon around the base of each plant, but not to exceed one application in a season.
Great for: Root crops, acid soil loving fruit trees, livestock, and lawns. Avoid use among others close to acid-loving plants such as blueberries and azaleas.
11. Worm Castings / Vermicompost (NPK ~1-0-0)
Worm castings contain low NPK values with high microbial diversity and plant hormones.
Tools needed:
- 1 lb. Vermicompost finished
- 1 gal. Water
How to make:
Load both ingredients in a mesh/delicates whether in your bathtub, stockpot, or 5-gallon bucket, and let those castings cast 24/7 to steep. Place in the shop for aeration.
Application: Use straight as a foliar spray or soil drench, applying with a spacing of two weeks between each application.
Top uses: Seedlings, Transplants, Container Gardens, and Soil Biology Enhancers in Any Growing Systems.
12. Molasses and Compost Microbial Drench (Microbe Activator)
The unsulfured molasses feeds some kind of beneficial bacteria in the earth. It spices up microbial gravitation in the reheath to the compost.
Items needed:
- 2 tbsp. unsulfured blackstrap molasses
- 1 cup of Compost
- 1 gallon of Water
Procedure:
Dissolve the molasses in warm water. Add compost. Aerate using an air pump for 12 to 18 hours.
To use: Use it immediately as a soil drench and employ it within six hours of the brew.
Ideal for: Reestablishing exhausted soils, firing up new garden beds, or promoting mycorrhizal networks around fruit trees.
DIY Organic Fertilizer NPK Comparison Chart

The table below summarizes the twelve recipes by approximate NPK, primary benefit, and safe application rate.
|
DIY Fertilizer |
Approx. NPK |
Primary Benefit |
Application Rate |
|---|---|---|---|
|
Compost Tea |
0.5-0.5-0.5 |
Balanced nutrition + microbes |
1:4 dilution, every 14 days |
|
Banana Peel Tea |
0-0.3-1.2 |
Flowering and fruiting |
Undiluted weekly |
|
Eggshell Powder |
0-0-0 + 1.2% Ca |
Calcium, cell wall strength |
1 tbsp per plant monthly |
|
Coffee Grounds |
2-0.3-0.2 |
Nitrogen, soil structure |
0.5-inch ring monthly |
|
Epsom Salt |
0-0-0 + Mg/S |
Magnesium deficiency |
1 tbsp per gallon, every 4-6 weeks |
|
Grass Clipping Tea |
1-0.2-1.5 |
Quick green growth |
1:2 dilution weekly |
|
Comfrey Tea |
1.8-0.5-5 |
Potassium, trace minerals |
1:10 dilution every 14 days |
|
Fish and Seaweed |
5-2-2 |
Complete balanced feed |
1:5 dilution every 10-14 days |
|
Manure Tea |
Variable |
Heavy nitrogen + organic matter |
1:10 dilution, soil only |
|
Wood Ash |
0-1-5 |
Potassium, pH adjustment |
1 tbsp per plant per season |
|
Worm Castings Tea |
1-0-0 |
Microbial diversity |
Undiluted every 14 days |
|
Molasses Drench |
N/A |
Microbe food, soil activation |
Undiluted, single application |
Important caveat: The N-P-K numbers are general and taken from agricultural data sources. Any DIY organic fertilizer you make will depend on the source of materials, the maturity of the compost, the water chemistry, and the brewing time. The numbers serve as traveling markers rather than precise specifications.
How to Apply DIY Organic Fertilizer Safely
Even natural inputs can harm plants, soil, or human health when misused. Follow these safety protocols every time. For step-by-step application techniques, see our guide on how to apply organic fertilizer to different soil types and crop stages.
Test Your Soil First
A simple soil test reveals pH, nitrogen, phosphorus, and potassium levels. Without this guide, you can’t let people discourage you from spending time on your garden’s wholesome personality. Most county extension offices give very affordable tests. Test your soil at least once a growing season.
Watch Out For Your pH Levels
Additions can make the soil pH overly geological. For instance, the effect of wood ash is to raise pH. New coffee grounds can lower it a tad from acidic. Breaking down, eggshells decrease the acidity bit by bit.
If amendments are heaped on top of one another without verifying the texture of the soil will properly absorb them, they may well end up locking nutrients in a way where plants can’t access it.
Following Pathogen Rules
Raw manure, humanure without any treatment, and some kitchen scraps can carry parasites that lead to serious reactions. The best practice is to never apply raw manure tea to leafy greens less than 120 days from harvest. Always wear gloves as you harvest and use fermented fertilizers. Throughout produce washing, remember to rinse well, even though it comes from organic gardens.
For authoritative guidelines on raw manure handling, refer to the USDA National Organic Program standards.
Store Liquid Brews Properly
Homemade liquid fertilizers are alive. They ferment, mold, and anaerobically decompose within 1 to 2 weeks at room temperature. Store brewed teas in a cool, dark place.
Use them within 7 days. If the smell shifts from earthy to rotten, discard the batch.
When DIY Is the Right Answer, and When It Is Not

DIY organic fertilizer shines in specific contexts. It also hits hard ceilings.
When DIY Wins
In reality, backyard vegetable gardens achieve a lot from compost tea, banana-soaked reactions, and clippings or mulch. It is a small enough scale wherein variability does not matter. Soil biology gets enhanced; kitchen waste stays away from landfill.
And the cost is essentially zero.
Home gardeners growing tomatoes, herbs, flowers, and leafy greens can replace 60 to 70% of their synthetic or commercial fertilizer needs with well-managed compost and targeted scrap teas. When you do need to supplement, our roundup of the best organic fertilizer for vegetables matches specific crops to proven products. The Rodale Institute has documented that compost alone can supply the majority of nitrogen for diversified vegetable plots.
When DIY Hits Its Limits
There is no consistent source for nutrient amendments as the size of the scale increases. The five-acre market gardener cannot rely on banana peels (or other black-boxed recipes) to fertilize several hundred tomato plants without significantly deviating from their full potential. The variability of NPK becomes too great, and the labor costs per item increase beyond reason.
On the other hand, the standard for export crops is much higher. International buyers and organic certifiers require materials lists, and homemade compost tea has no chemical testing from accredited labs, batch numbers, or heavy-metal screening. Some state that compost tea offsets the cost of composting, but application “as an amendment” can be challenging. If you are growing for export only or if your operation requires organic certification, you still need to be prepared to source some finished, certified inputs.
Ultimately, certain crops are simply too high-stake to fool around with. For cannabis, citrus, high-value greenhouse vegetables, all these require precise nutrition at specific growth stages. A phosphorus spike missed during flowering or calcium dip missed around fruit set can set you back thousands of dollars of lost yield.
For a frank discussion of the tradeoffs between organic and synthetic fertilizer, see our detailed comparison.
The Hybrid Approach, Pairing DIY With Certified Organic Fertilizers
When some growers decide to use only compost piles while others go for commercial products, the smartest go for a midway through hybrid programs.
James owns and runs the operation of a beautiful 2-acre vegetable farm near Columbus, Ohio. He brews on-farm compost teas from his worm-castings and other organic materials for his soil biology. He side-dresses with grass clippings for nitrogen. However, his flowering-stage heirloom tomato plants receive a certified organic mixture of 4-6-4, which is a “complete package” of mineral NPK, plus heavy-metal testing from the lab.
Result? His soil tests are showing rising organic matter through the use of the DIY inputs. His harvest weights are consistent year after year because commercial fertilizers are filling in the nutrient gaps that his compost is doing on its own.
This is already hybrid farming. Use DIY fertilizers to build soil biology, recycle waste, and reduce input costs. Buy certified fertilizers when precision, consistency, and documentation are the main concerns.
For growers who want to explore professional-grade organic options, our certified organic fertilizer line includes humic acid-based formulations tested to REACH, SGS, and BV standards. Every batch carries a certificate of analysis so you know exactly what your plants receive.
Frequently Asked Questions

What is the best homemade organic fertilizer?
Based on targeted crops, specially designed options are available. While compost tea meets everyday requirements for NPK and microbes for the various plants in the garden, it still lacks potassium needed by flowering and fruiting crops in kilos. Those bizarre ones, comfrey or banana peels, come to the fore in these situations.
How do you make organic fertilizer at home?
There are hundreds of ways to prepare organic nutrients, each greener and gentler than the other. A simple method is compost tea. Fill a mesh bag with fairly mature compost and plunge it into a bucket of water for 24 to 36 hours. Dilute the liquid to a ratio of 1:4, and pour over your soil. Or even go beyond: Make yourself a banana peel soak or prepare a cup of eggshell powder or fish emulsion mix — it’s all up to you.
Is it good to fertilize using coffee ground?
When rightly applied, they are good to be used. Composted ones are nearly 2 percent nitrogen and have a very close pH to neutral. The raw grounds, if applied in an excessive manner, could cause problems for nitrogen’s release into the soil, thereby binding it temporarily. Always use every single drop from your brewed coffee and make sure your innocent seedlings are kept out of contact.
Is urine a good fertilizer?
Urine diluted to about 6% volume is mostly nitrogen (between 6-8% concentration). Its use as a crop input dates back to ancient times, but it can be unsafe if not properly handled. Health concerns include pathogen risk for food crops in home gardens and socially unacceptable practices for use. Sticking to herbivore manure teas or plant-based recipes will play safer.
What distinguishes DIY from commercial organic fertilizer?
DIY is made out of household wastes and farm wastes. It contains variable nutrient content and lacks certification documentation. The commercial organic fertilizers are made to NPK standards and tested for contaminants. They are certified to standards like REACH, SGS, BV, or OMRI.
DIY builds soil biology. Precise nutrition is being poured out of commercial products.
How often do I plan to apply DIY organic fertilizer?
For the drenching application, apply compost tea and worm casting drenches every 14 days, while your plants are in active growth. Banana peel or comfrey tea must be applied every 10 to 14 days during flowering. For side dressing, apply coffee grounds or eggshell powder monthly.
Always observe your plants. Yellowing leaves may spell too little nitrogen. Brown leaf tips may communicate over-fertilization.
How long does homemade liquid fertilizer last?
Aerated compost teas can lose viability within 7-10 days if stored in a cool dark place. Non-aerated brews go anaerobic in 3-5 days and should be used quickly. Fermented concoctions – comfrey or fish – can last from 2-3 weeks after being sealed, though it still loses potency. Therefore, if you are unsure, brew it fresh.
Conclusion
Organic fertilizer creation is not a myth or supernatural activity. It is real and sustainable; it works once you understand why chemistry dictates this. The twelve recipes mentioned later in 90-Day, which this guidance offers, give you typical NPK benchmarks to use. Prove your point, then and fertilize with confidence rather than by guess.
Put together your compost pile. Brew your own tea. Burry your banana peels. But keep the long-range in view.
It all began with plenty of rice straw compost and fish waste tea to feed chili plants for a small farm in Vietnam. Five years later they began exporting to European buyers who needed REACH-approved ingredients and NPK.
They kept the compost down. They put certified organic fertilizers on top of it.
This is the face of sustainable agriculture in the future – it doesn’t pit DIY against commercial. Rather, both should be used wisely.
Ready to scale beyond the backyard? Browse our certified organic fertilizers and request a customized blend tailored to your soil test, crop plan, and certification requirements. From kitchen scrap compost to export-grade agriculture, the right nutrition at the right time is what grows a healthier planet.